Now that you have an active license of our WooCommerce Sync for QuickBooks POS, the first step in setup is to install our sync and connect it to your QuickBooks POS company!
Note: Ensure you've checked our Requirements before you install - before getting started below.
In your WordPress Admin
- Download the latest version of MyWorks Sync from your account with us.
- Log into your WordPress Admin, go to Plugins > Add New, and click Upload Plugin.
- Select the .zip file you downloaded from your account with us, and choose Install Plugin.
- On the following screen, click Activate.
- Congratulations! Our sync is now installed. You will see a new tab on your WordPress sidebar - called MyWorks Sync.
- Visit MyWorks Sync > Connection in your WordPress admin.
- Enter in your license key (can be found in your confirmation email from us, or the download page in your account with us).
- Click Save and Generate QWC file on the lower left of the page. You may leave the randomly generated username and password in place on this page - you'll need the password in the next step.
- This file will be downloaded to your Downloads folder.
On your Windows Computer > Web Connector
- Open the QuickBooks Web Connector. QuickBooks POS requires it be v2.1.0.30, but if this isn't already installed on your computer, you can download and install v2.1.0.30 from Intuit's site here.
- Open your QuickBooks POS company on your main/server QuickBooks POS computer, and log in as an administrator. Ensure that QuickBooks POS is in Multi-User mode as well.
- Click Add Application, and select the QWC file you downloaded from our sync above.
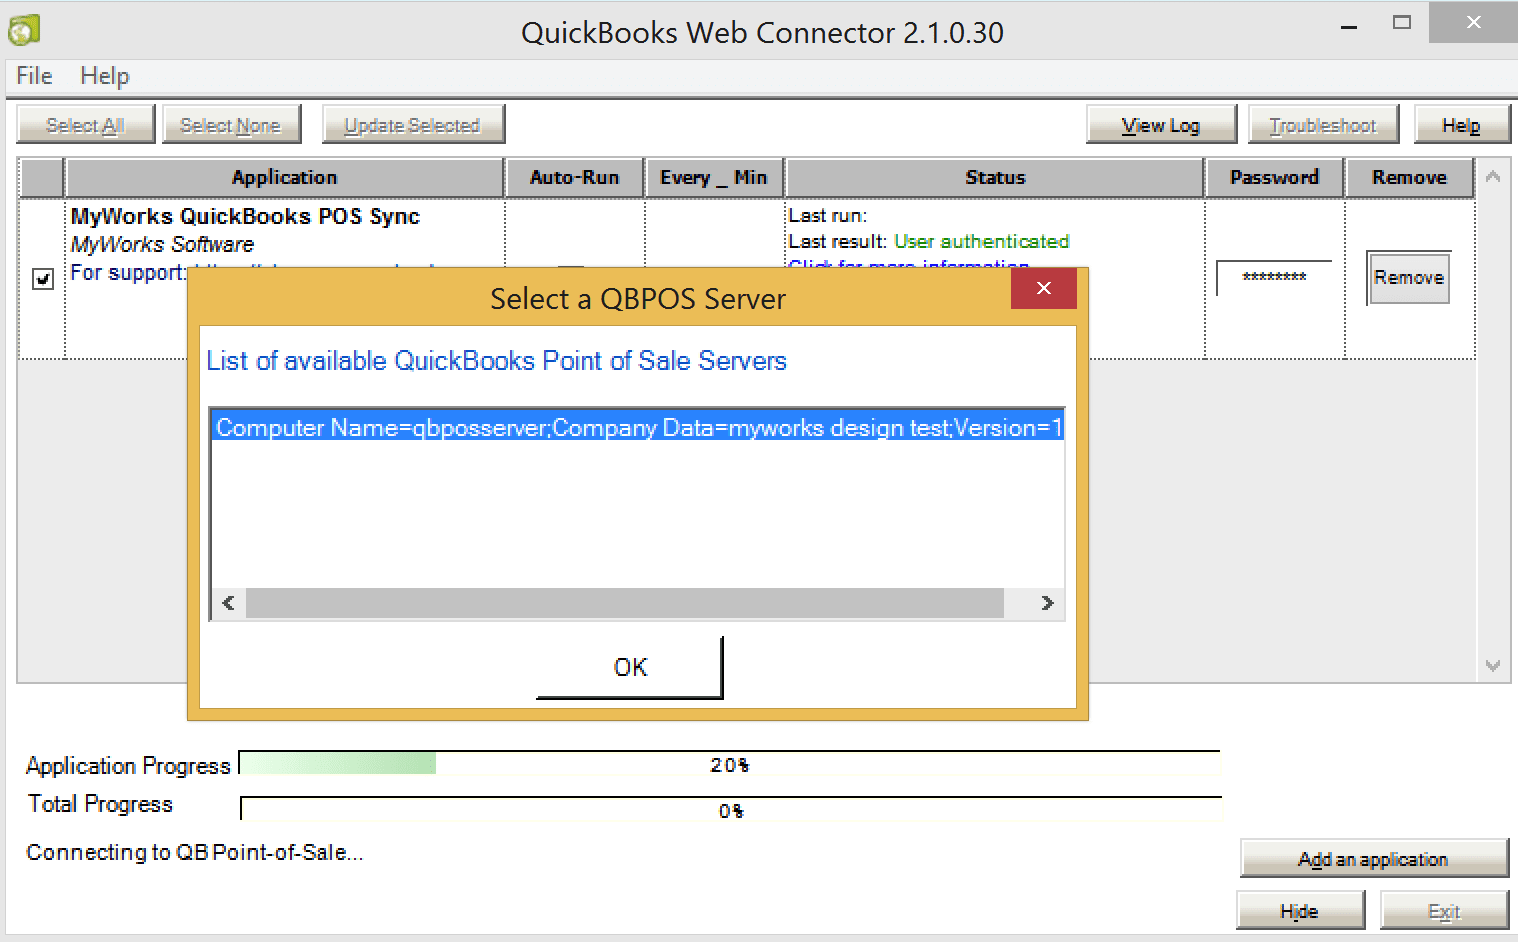
- Continue through the security prompts to select your QuickBooks POS server and confirm connecting to your QuickBooks POS company. If you receive a popup as shown in the example below, select the correct QuickBooks POS server, and click OK. This server information can also be set in MyWorks Sync > Connection to auto-select this and prevent the popup from displaying each time the sync runs.

Tips - having trouble connecting? Here's some tips to check:
- Ensure you're adding our QWC file on your main/server QuickBooks POS computer. This is the only computer the Web Connector is able to run on.
- Ensure the version of the web connector is v2.1.0.30. This is the correct version (per QuickBooks support) that should be used to connect with QuickBooks POS.
- Ensure your QuickBooks POS computer is in "Multi User" mode, which can be confirmed in the File menu within QuickBooks POS.
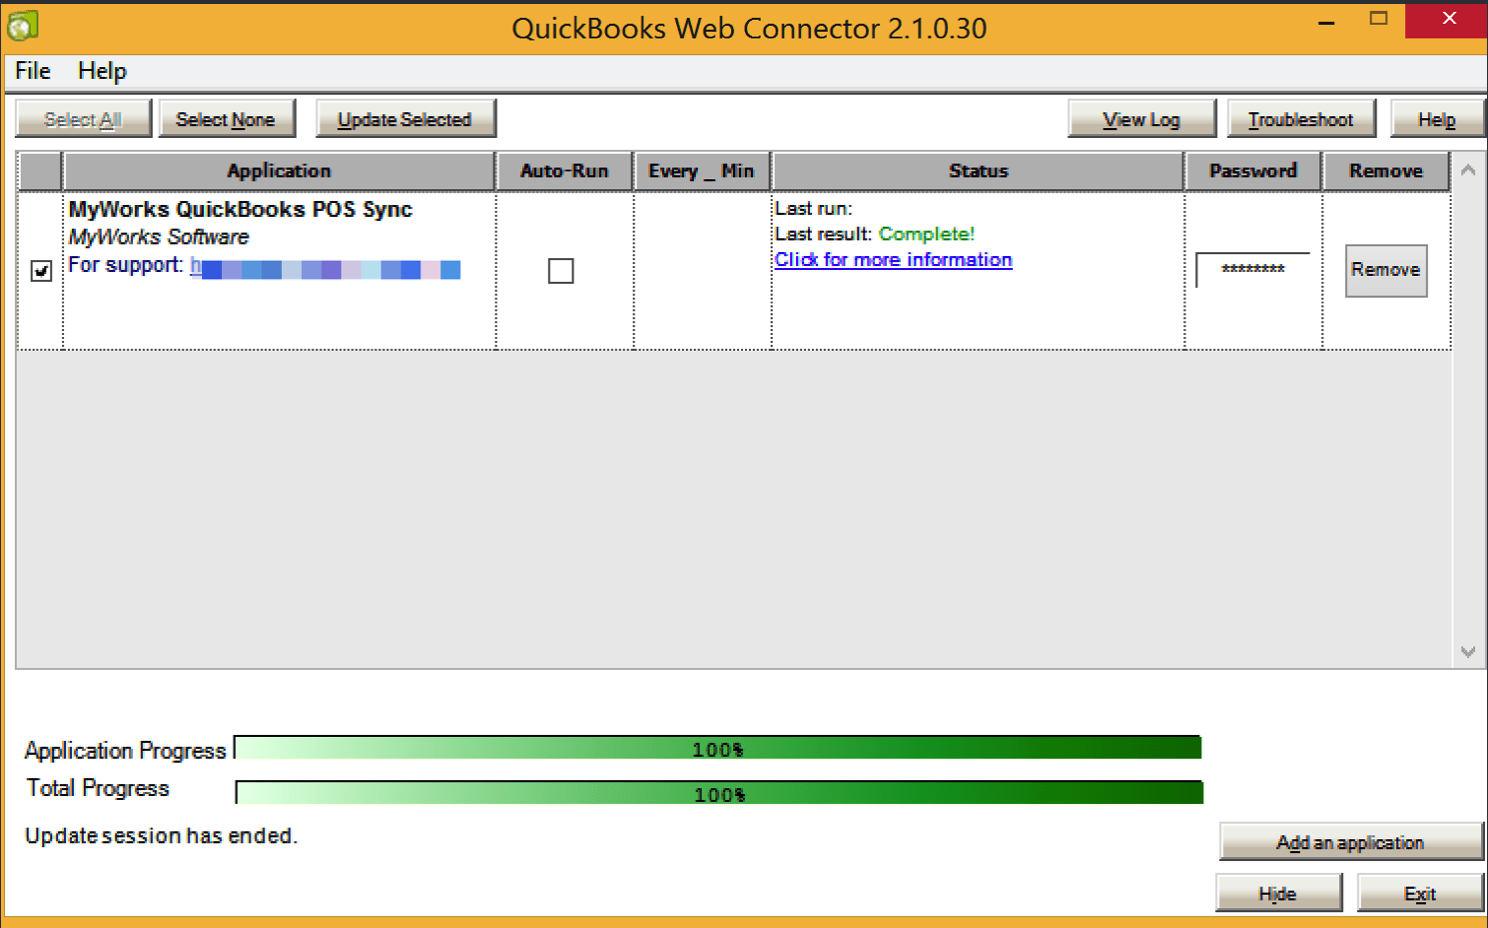
Once added, the Web Connector will look like the below. Ensure the password saved in that field is the same one generated earlier in MyWorks Sync > Connection.

Congratulations - you have completed setup. QuickBooks Web Connector is now connected to our sync on your WooCommerce site. At this point, you may move on to our general usage documentation - to proceed with setup. The next steps before syncing are refreshing your data and configuring your settings and mappings.