Batch Support will only create a bank deposit for the current day's sales at the end of every business day - after you enable it for a gateway in Map > Payment Methods. If you need to push old orders over to QuickBooks Online (aka any order placed in WooCommerce before batch support was enabled), you may do so in Push > Orders, but these orders/ payments will not be automatically batched in QuickBooks Online.
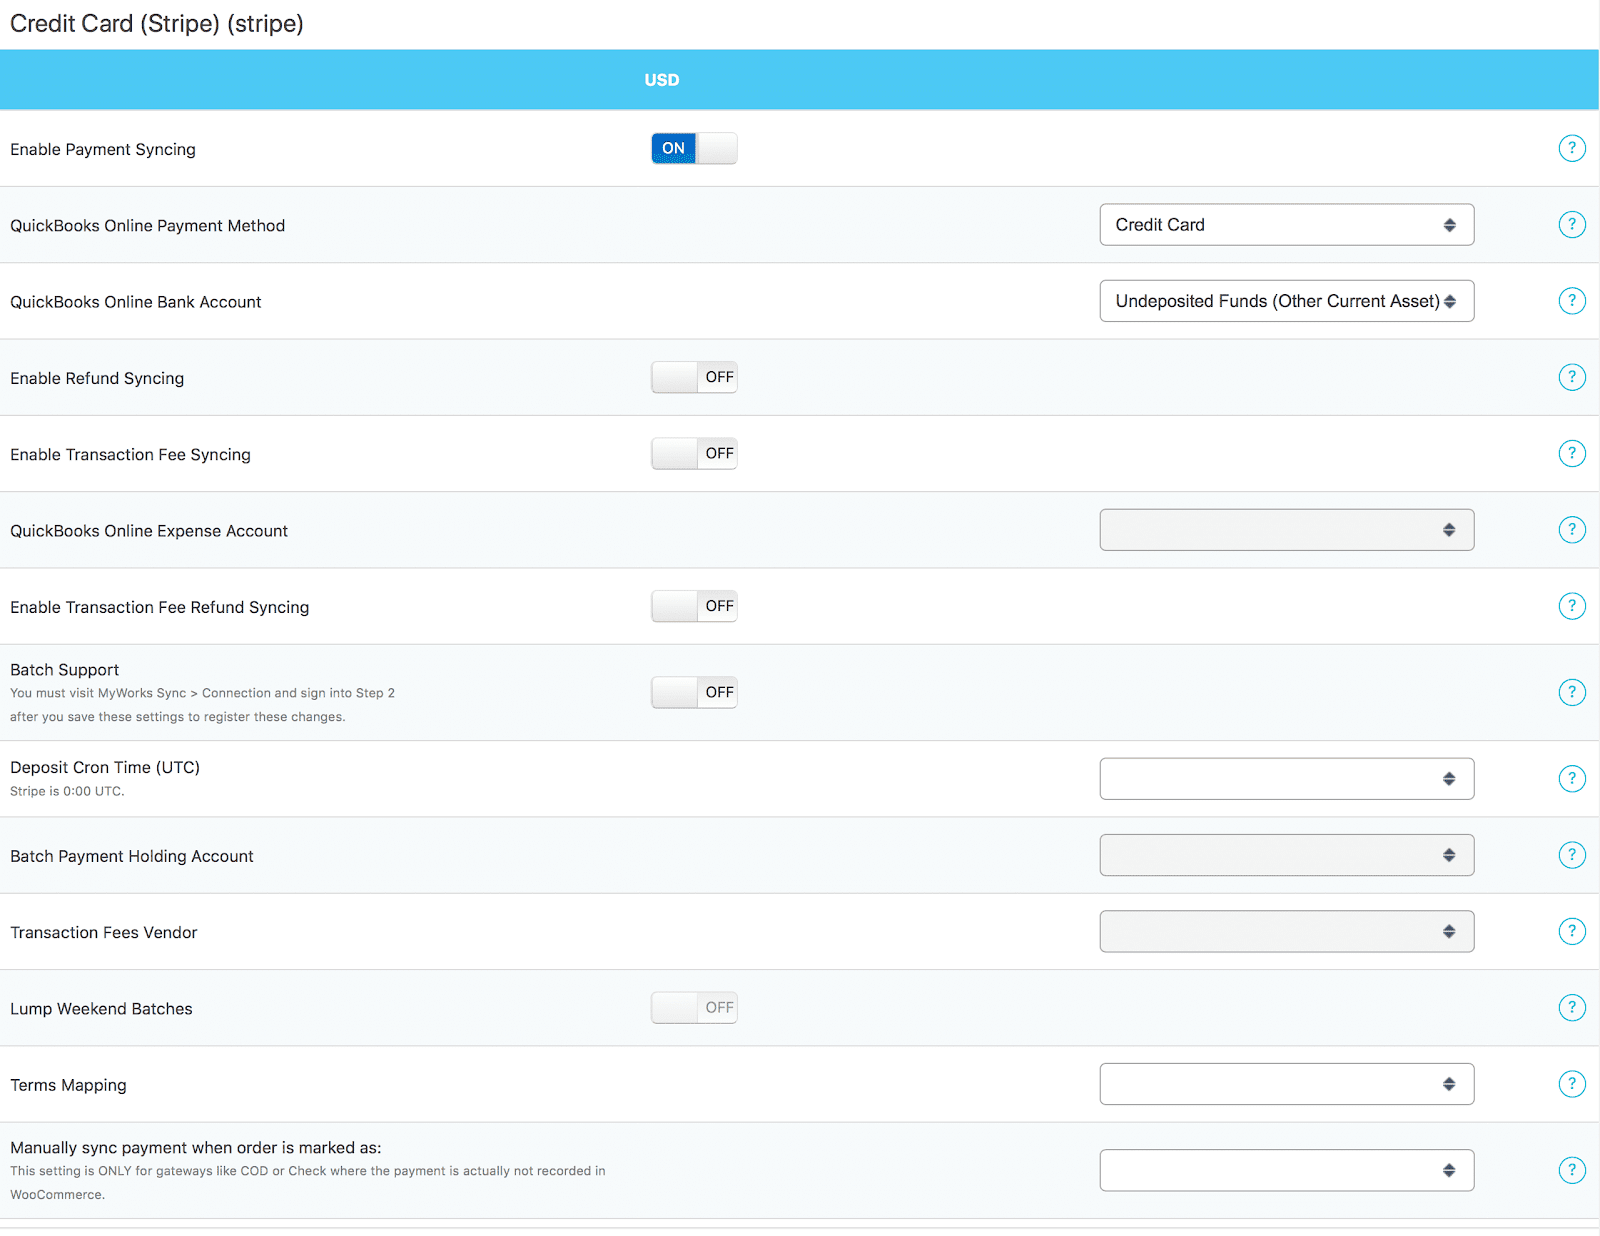
Because of this, we recommend temporarily turning batch support off in Map > Payment Methods, and setting the Bank Account to Undeposited Funds - when pushing over old orders. This will allow you to push over old orders/payments; have the payments still deposited to Undeposited Funds, and give you the opportunity to re-create the Bank Deposits manually in QuickBooks Online.
You have two options when pushing old orders to QuickBooks Online that were paid with a payment processor that batches your daily sales into one deposit. You can choose to:
- Sync payments to the Undeposited Funds account in QuickBooks, and create a manual Bank Deposit in QuickBooks, where you add the transaction fees as a line item at the bottom of the deposit (like our automatic Batch Support does), or
- Sync payments directly into your bank account, and have the transaction fees synced as an individual journal entry to QuickBooks when you push the payment over. This would result in the gross payment amount being deposited into your bank account, and the transaction fee being removed from your bank account - resulting in the net amount.
Not Seeing your Transaction Fees or Transaction ID record on a WooCommerce Order? Read This
Option 1: Creating a manual bank deposit in QuickBooks
First, in Map > Payment Methods, click Show Advanced Options. Then navigate to the payment method you have Batch Support turned on for, and set the QuickBooks Online payment method to Undeposited Funds. In this screen, ensure that Transaction Fee Syncing is off.

Once saved, you may visit Push > Orders/Payments to push over any pre-existing orders to QuickBooks.
Then, in QuickBooks Online, click on the + button on the top right, then Bank Deposit - to create a new bank deposit. The resulting screen will show you orders/payments that are in Undeposited Funds, waiting to be included in a deposit into your bank account.
On this screen, simply select the orders you'd like to include in this deposit. It's usually helpful to use your processor's batch/payout report to help find the orders in this list that should be in the deposit.
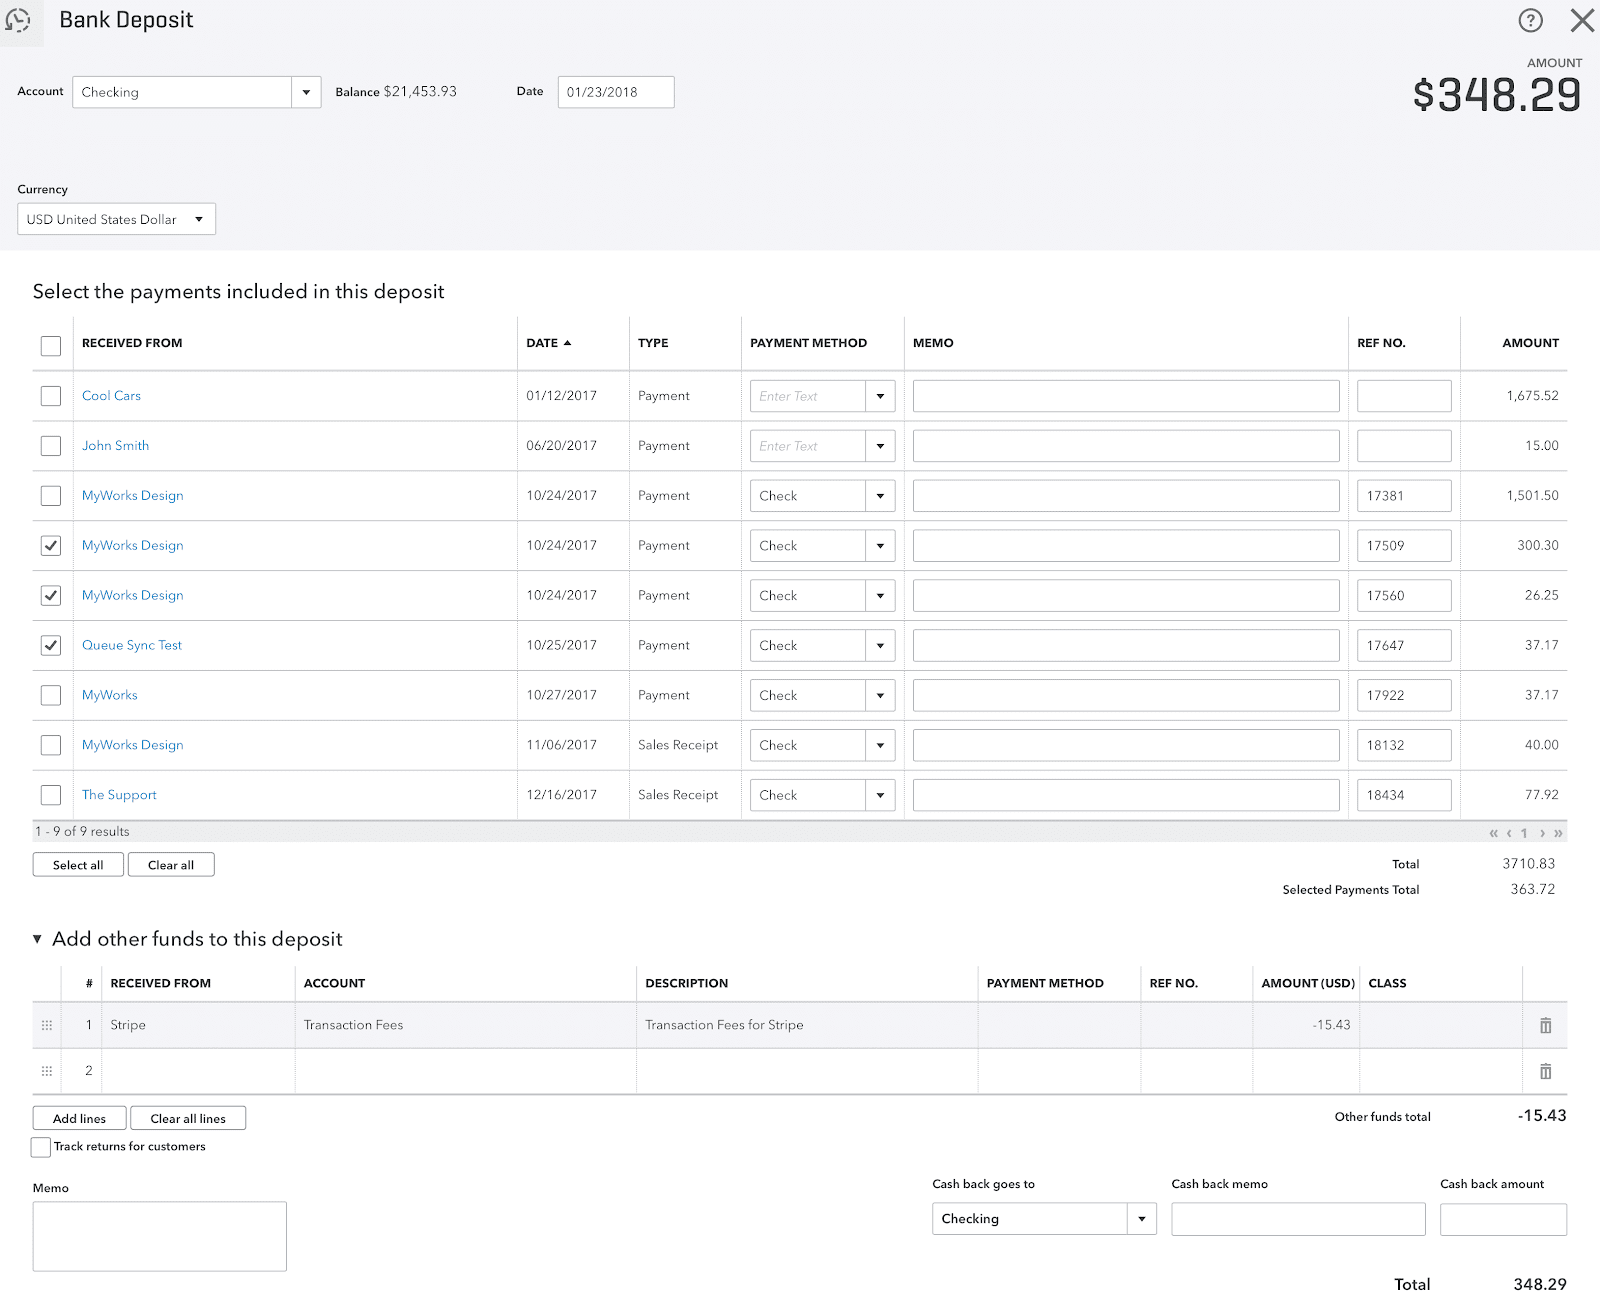
Then, at the bottom of the screen, in the Add other funds to this deposit section, add a new line item with a negative balance to represent the processor fees for this particular batch.
This should then bring your total for this Bank Deposit to match the total your processor deposited into your bank. Here is an example deposit:

Option 2: Syncing payments/transaction fees directly into your bank account
This method is an alternative choice for pushing payments to QuickBooks that were paid with gateways that deduct fees from each daily deposit that they batch and send to your bank account. If you choose to sync transaction fees as individual journal entries into QuickBooks using this method, it will not be possible to match your deposits in your Banking Feed with any deposit in QuickBooks Online.
If you are comfortable excluding any deposits in your Banking tab and not matching them to a Bank Deposit, you may proceed. At the end of the day - your bank account in QuickBooks would technically still be balanced since the gross deposit amount would be added into the bank account from Undeposited funds, and the journal entries would be deducted from the bank account and sent to a Transaction Fee expense account - you wouldn't be able to "Match" any bank transactions from the banking feed, since the net amounts wouldn't match.
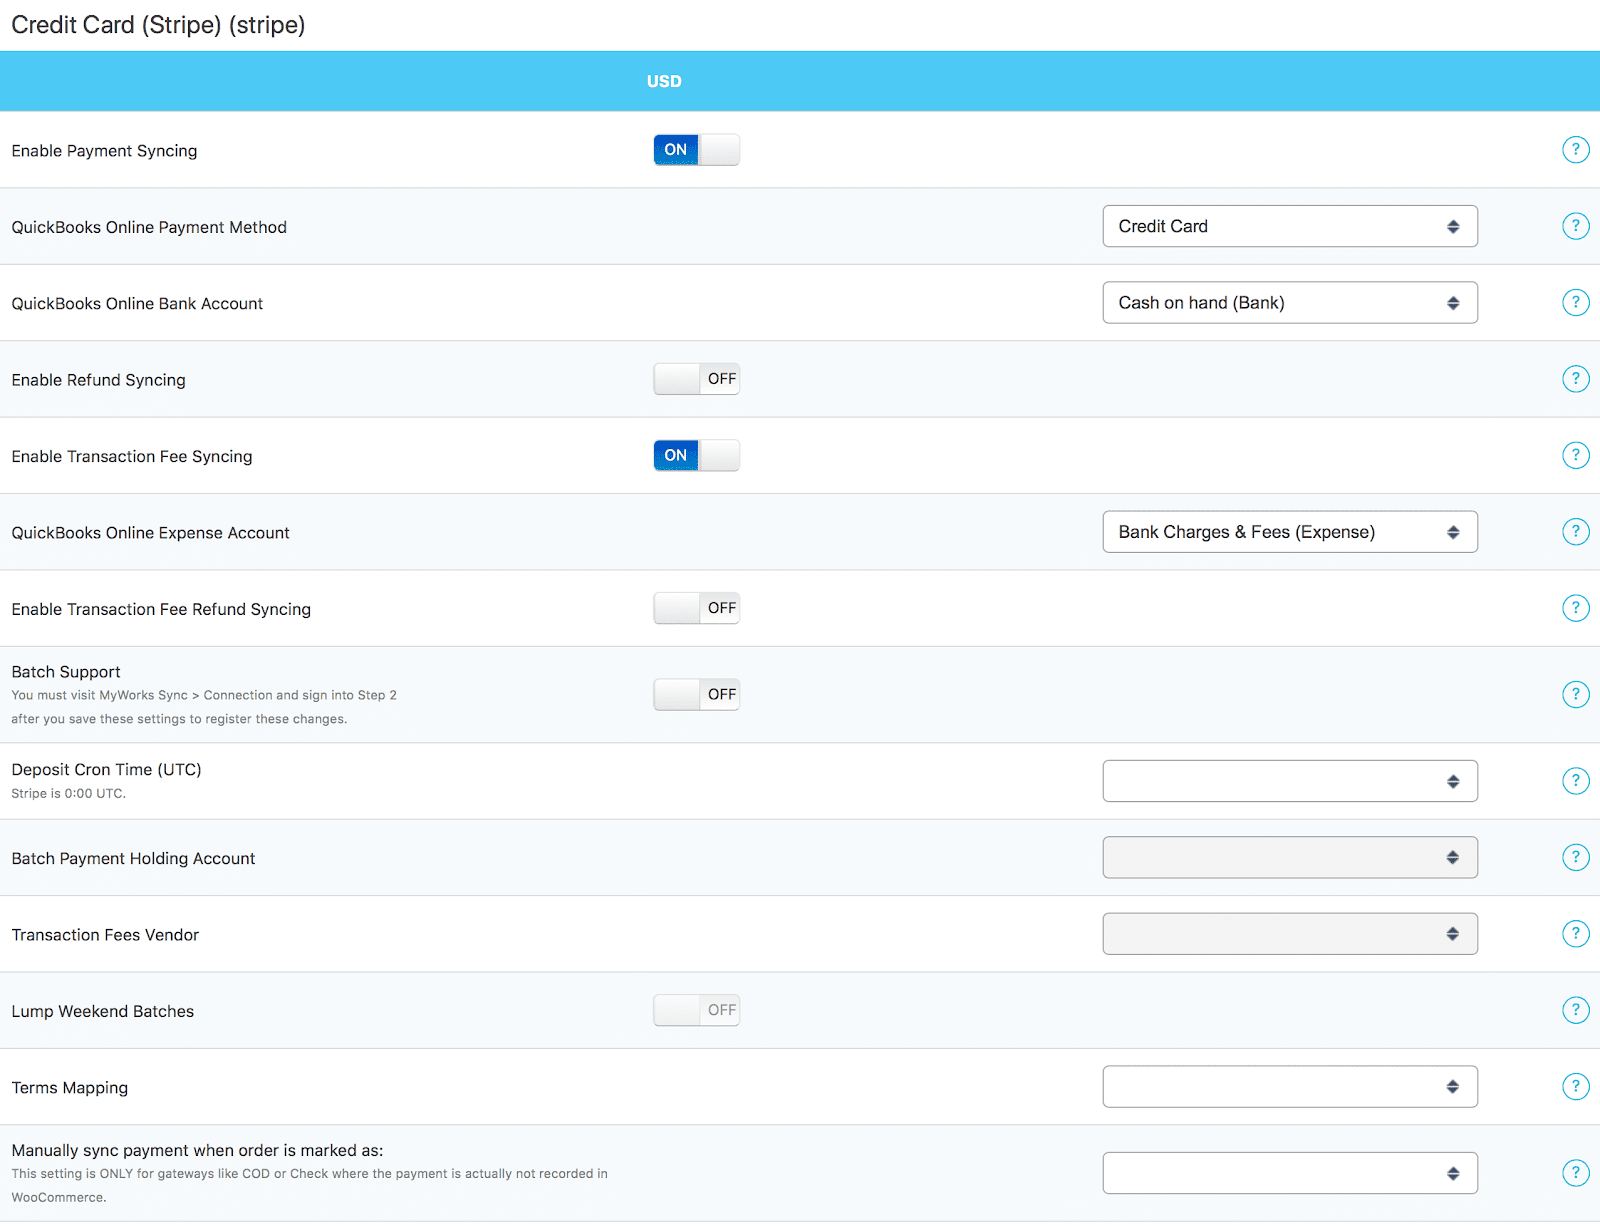
To sync transaction fees as a journal entry into QuickBooks when you push a payment/order, turn on Transaction Fee syncing in Map > Payment Methods for the related gateway. You can read more about Transaction Fee Syncing here.
Here's an example screenshot.
