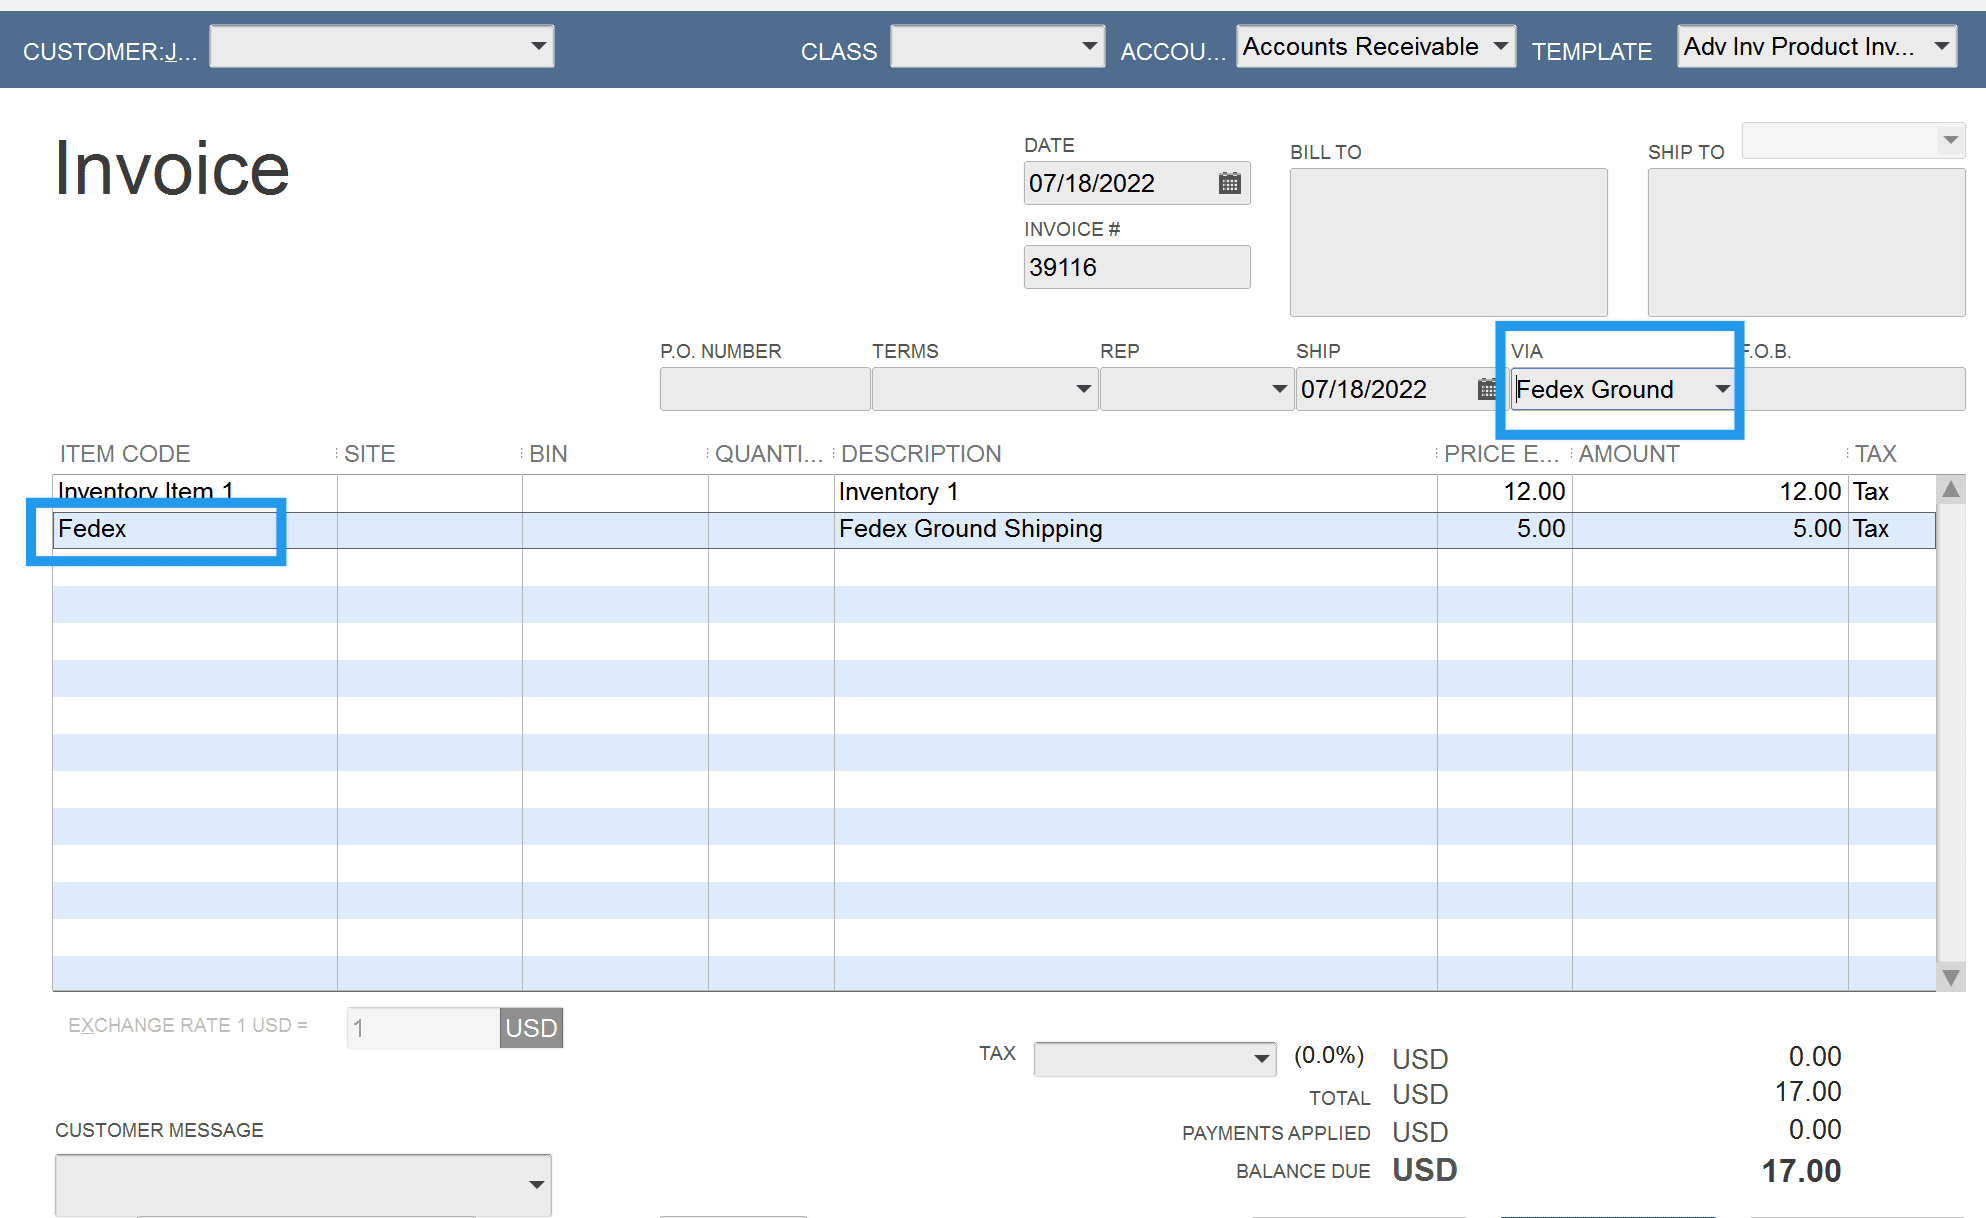
In addition to syncing the shipping cost of a WooCommerce order into QuickBooks Desktop as a line item, MyWorks Sync also supports customizing two areas of the QuickBooks order around shipping:
- The QuickBooks item that's used as the line item for the shipping charge in an order,
- The value set in the separate "Ship Via" field in the QuickBooks order.

Default Shipping Line Item
A Default QuickBooks Shipping Item can be set in MyWorks Sync > Settings > Default. This would be a single QuickBooks item (normally called "Shipping" or "Freight") - and would be used as the QuickBooks line item inside all orders when syncing your orders with shipping into QuickBooks.
Mapping separate line items and Ship Via values
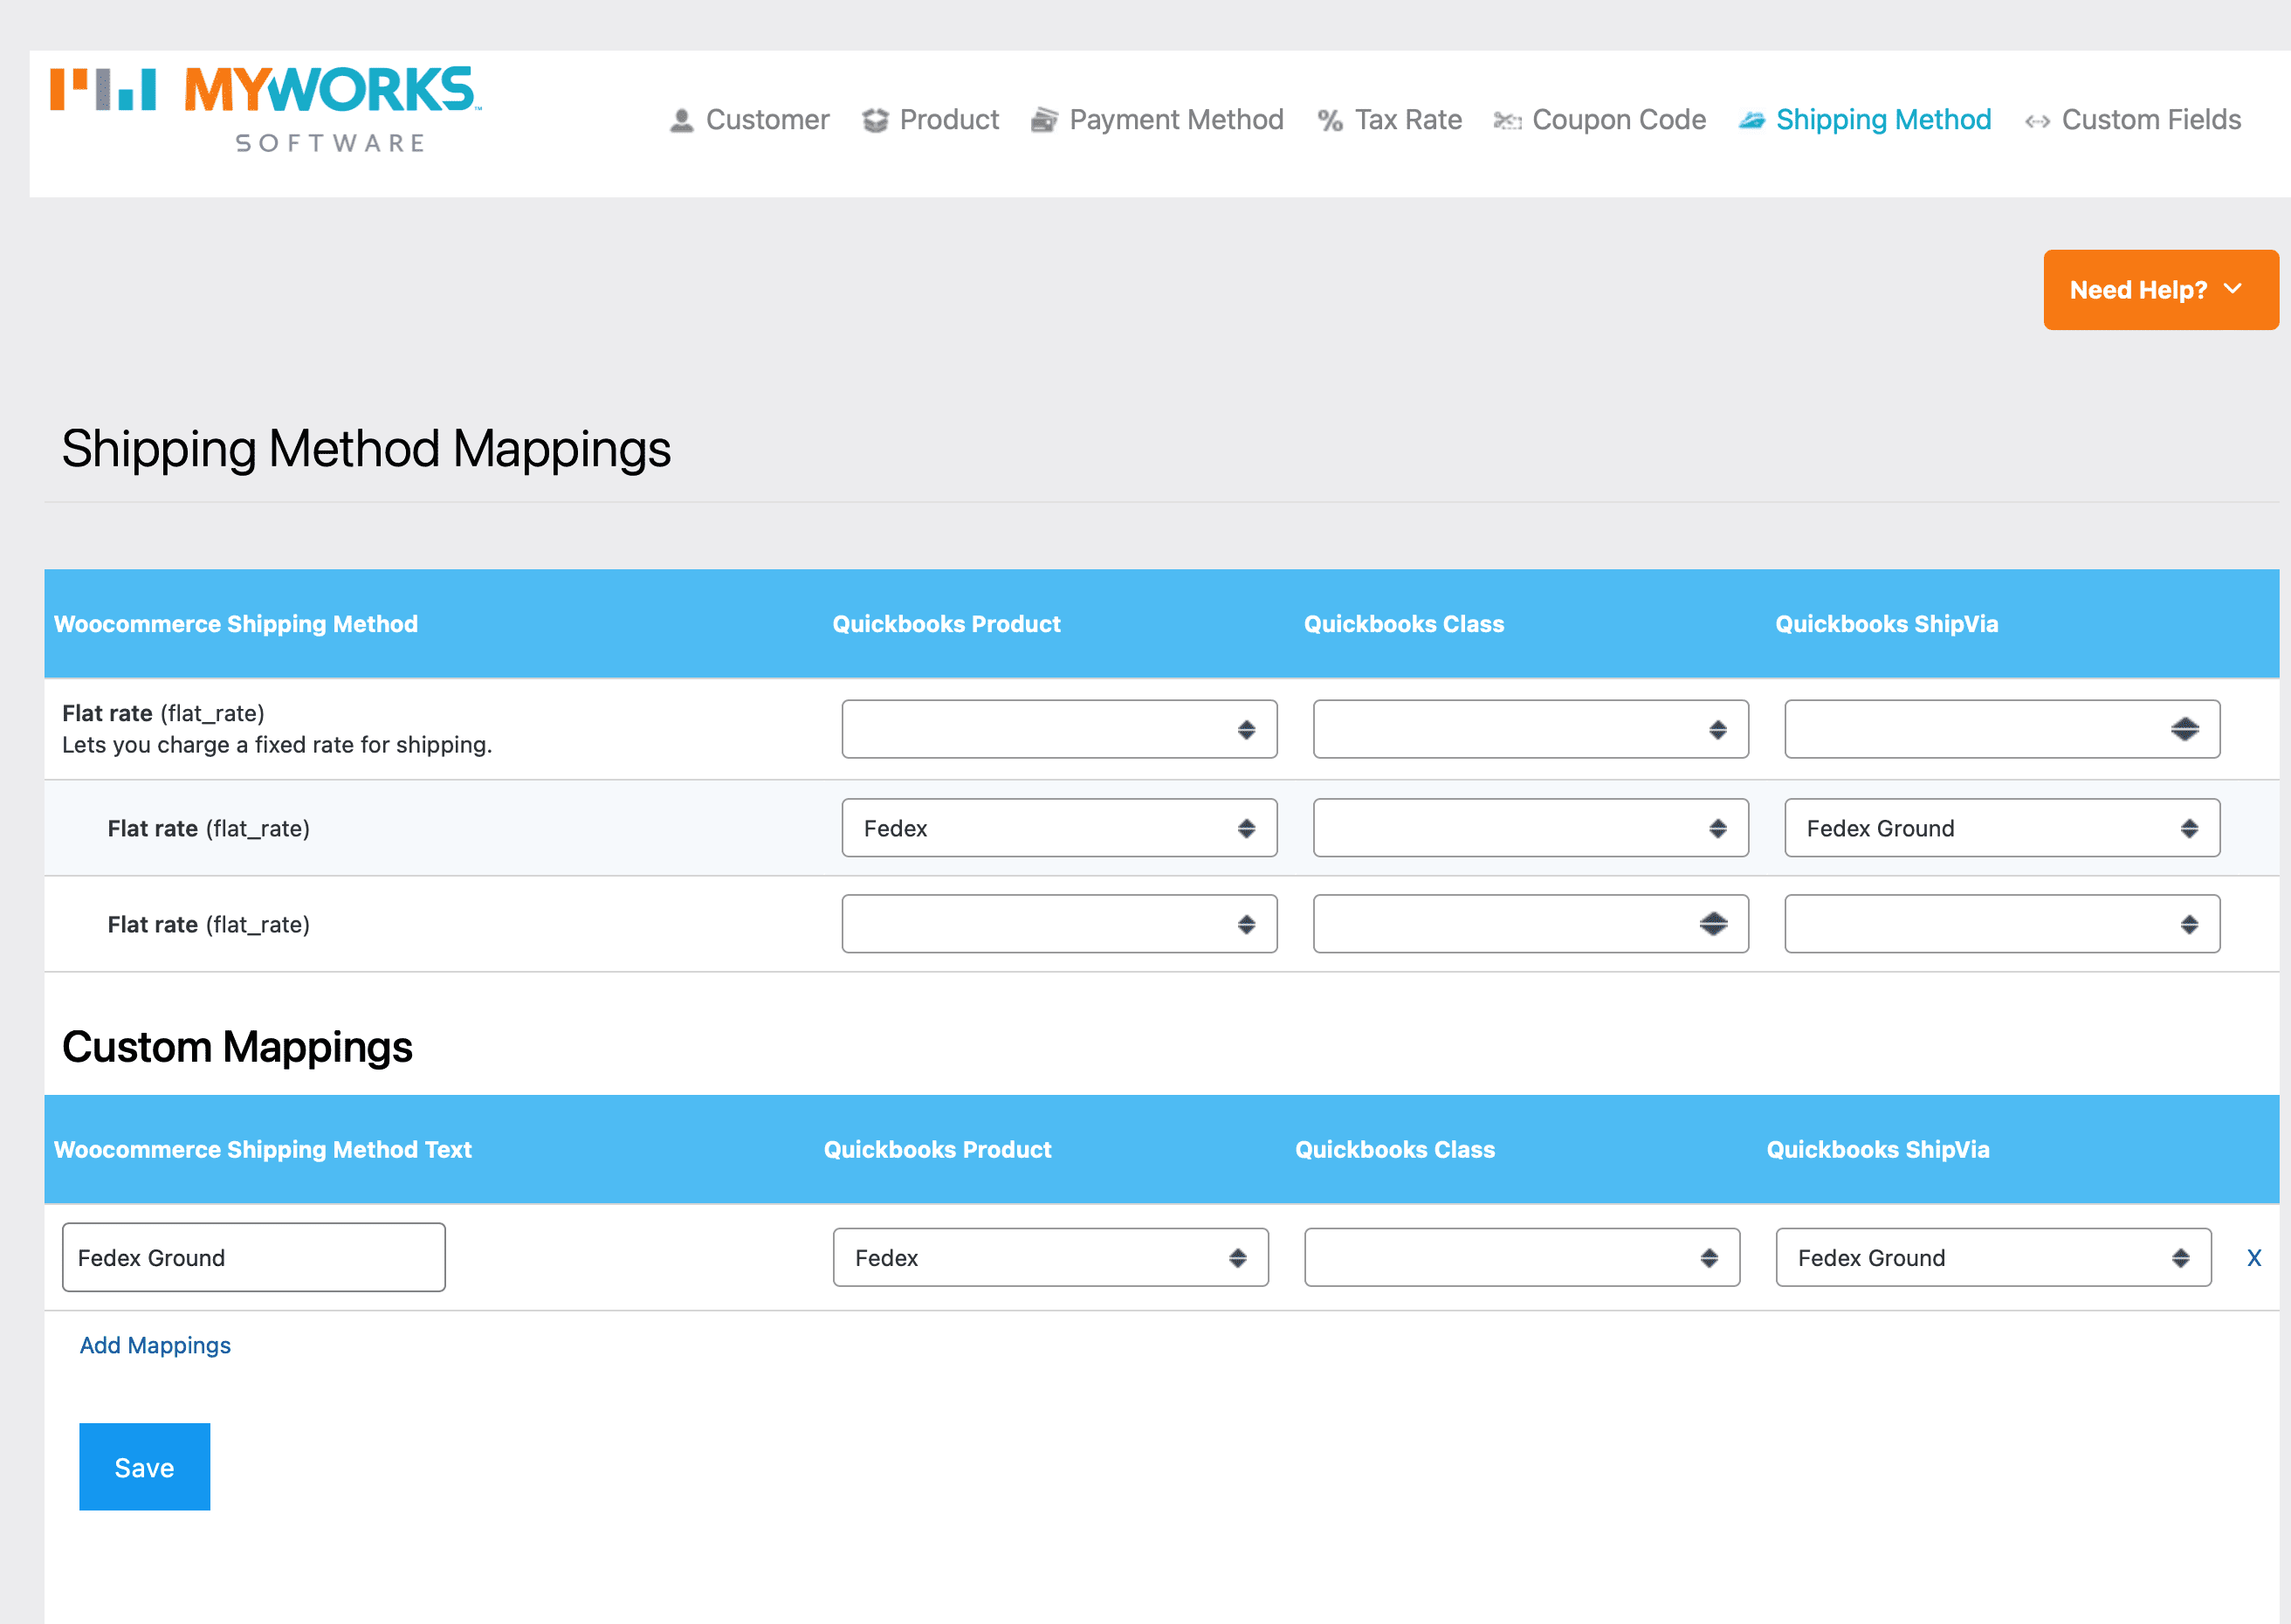
If you'd also like to set a "Ship Via" value in QuickBooks, and/or designate different shipping line items in a QuickBooks order, based on the shipping method used in the WooCommerce order, this can be done in MyWorks Sync > Map > Shipping Methods, as in the screenshot below.
In the upper area of the below screenshot, we'll show the existing WooCommerce shipping methods we're able to read from your store, and you'd be able to map them to a QuickBooks item, Class, and Ship Via value, which we'd follow as we sync an order into QuickBooks.
If your shipping plugin handles shipping methods in a way that we can't read in the upper area of the below example, we also support custom mappings, to add additional mappings you'd like to map individually.
Note: It is required to set a QuickBooks Product in the page below, and Class + Ship Via are optional.

As long as the text entered on the WooCommerce Shipping Method Text field is an exact match to the name of the shipping method in a WooCommerce order, this mapping would be applied when syncing the order!
The above custom mappings can be enabled by visiting MyWorks Sync > Settings > Mapping and turning ON the Enable Custom Mapping in Map -> Shipping Method Page switch.