What is the Intuit QuickBooks Web Connector?
The Intuit QuickBooks Web Connector is a Windows application developed by Intuit that allows data exchange with QuickBooks Desktop and is how MyWorks Sync connects WooCommerce to QuickBooks Desktop. It can be downloaded here.
Since QuickBooks Desktop doesn't have a standard API to use for integrations, our syncing solution uses a combination of our proprietary Wordpress plugin + the Intuit Web Connector to sync data. For more information on how our sync works, read our article here.
Although we detail how to setup the QuickBooks Web Connector in our installation instructions here, the purpose of this article is to clarify and recommend everyday use practices for using the QuickBooks Web Connector with our syncing solution.
Initial Use / Setup
After installing the QuickBooks Web Connector application on your computer, as shown in our installation instructions, you'll download a connection file from our sync in your WooCommerce admin area and Add it as an Application to the QuickBooks Web Connector.
Right-click the QuickBooks Web Connector icon in your Windows task bar to pin it to the task bar for easy future access!
During Setup:
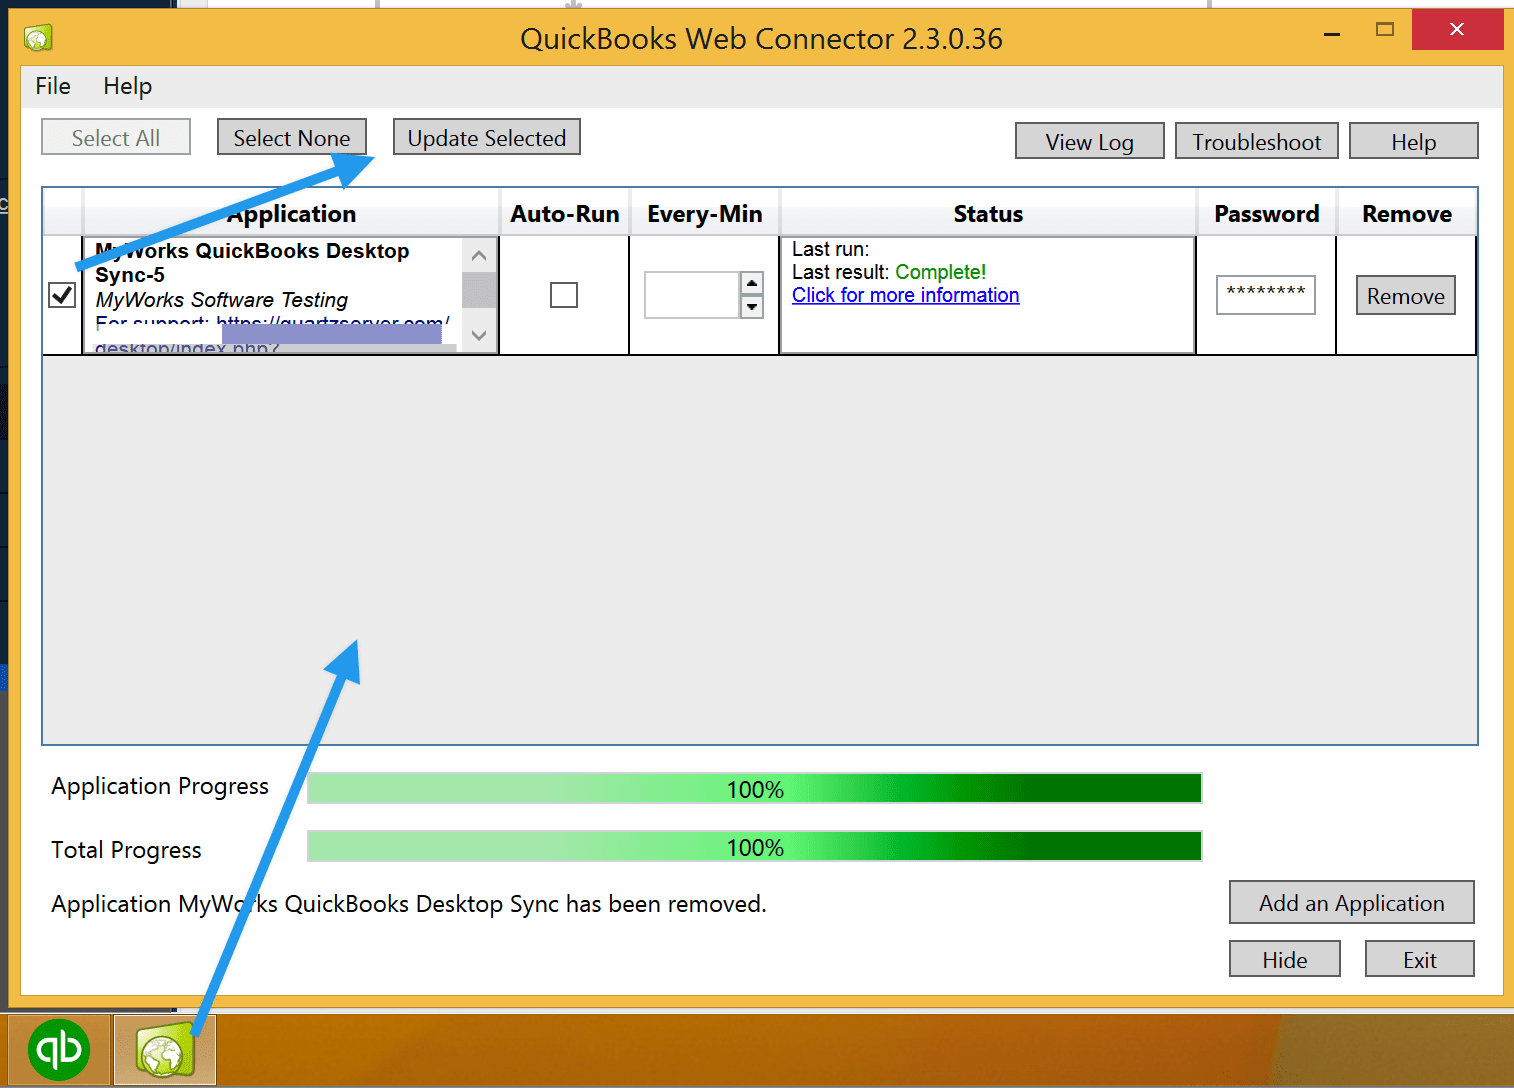
During setup, and while running the first few initial updates/syncs, we recommend you keep the AutoRun checkbox off, and instead select the checkbox to the left of the application, then click the Update Selected button on the top of the window to manually initiate a sync. This gives you more control over the interval of the syncing as you get comfortable doing the initial data refresh - then syncing your first data with our plugin.
Running the Web Connector
- You can open the web connector from within QuickBooks Desktop by visiting: File > (App Management) > Update Web Services
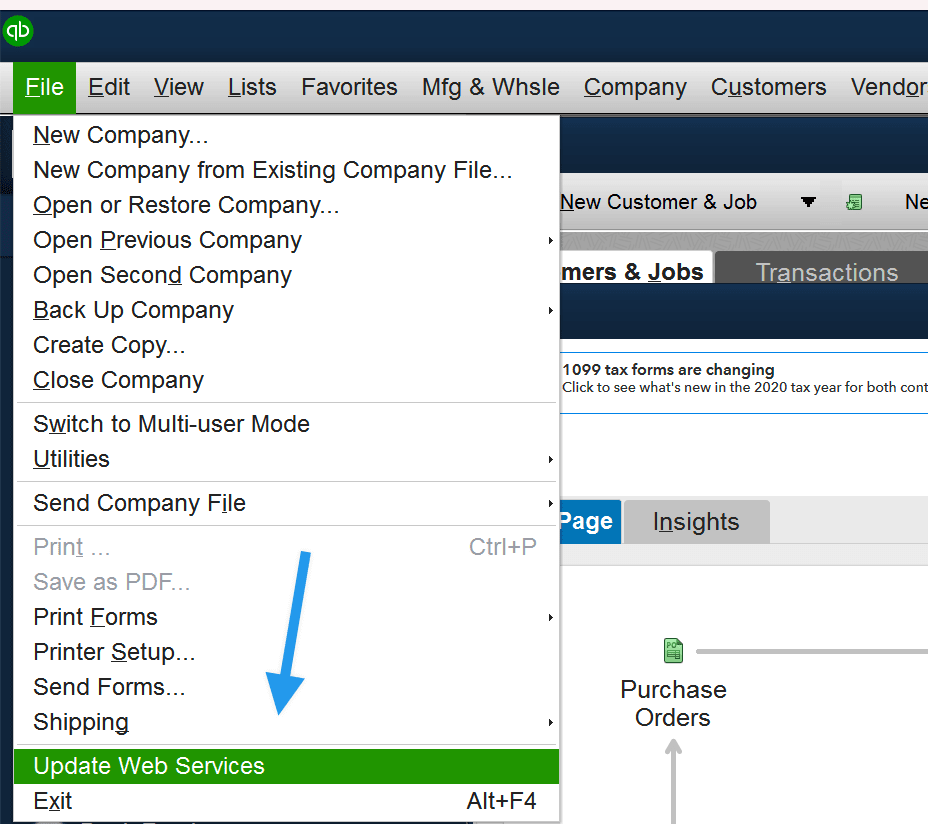
Or alternatively, search for "Web Connector" in the Windows Search Bar: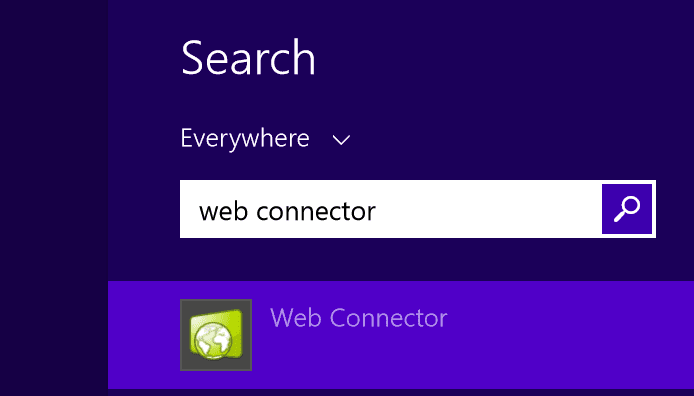
- Once it is opened, you want to check the box next to your company name, and then hit "Update Selected"
-
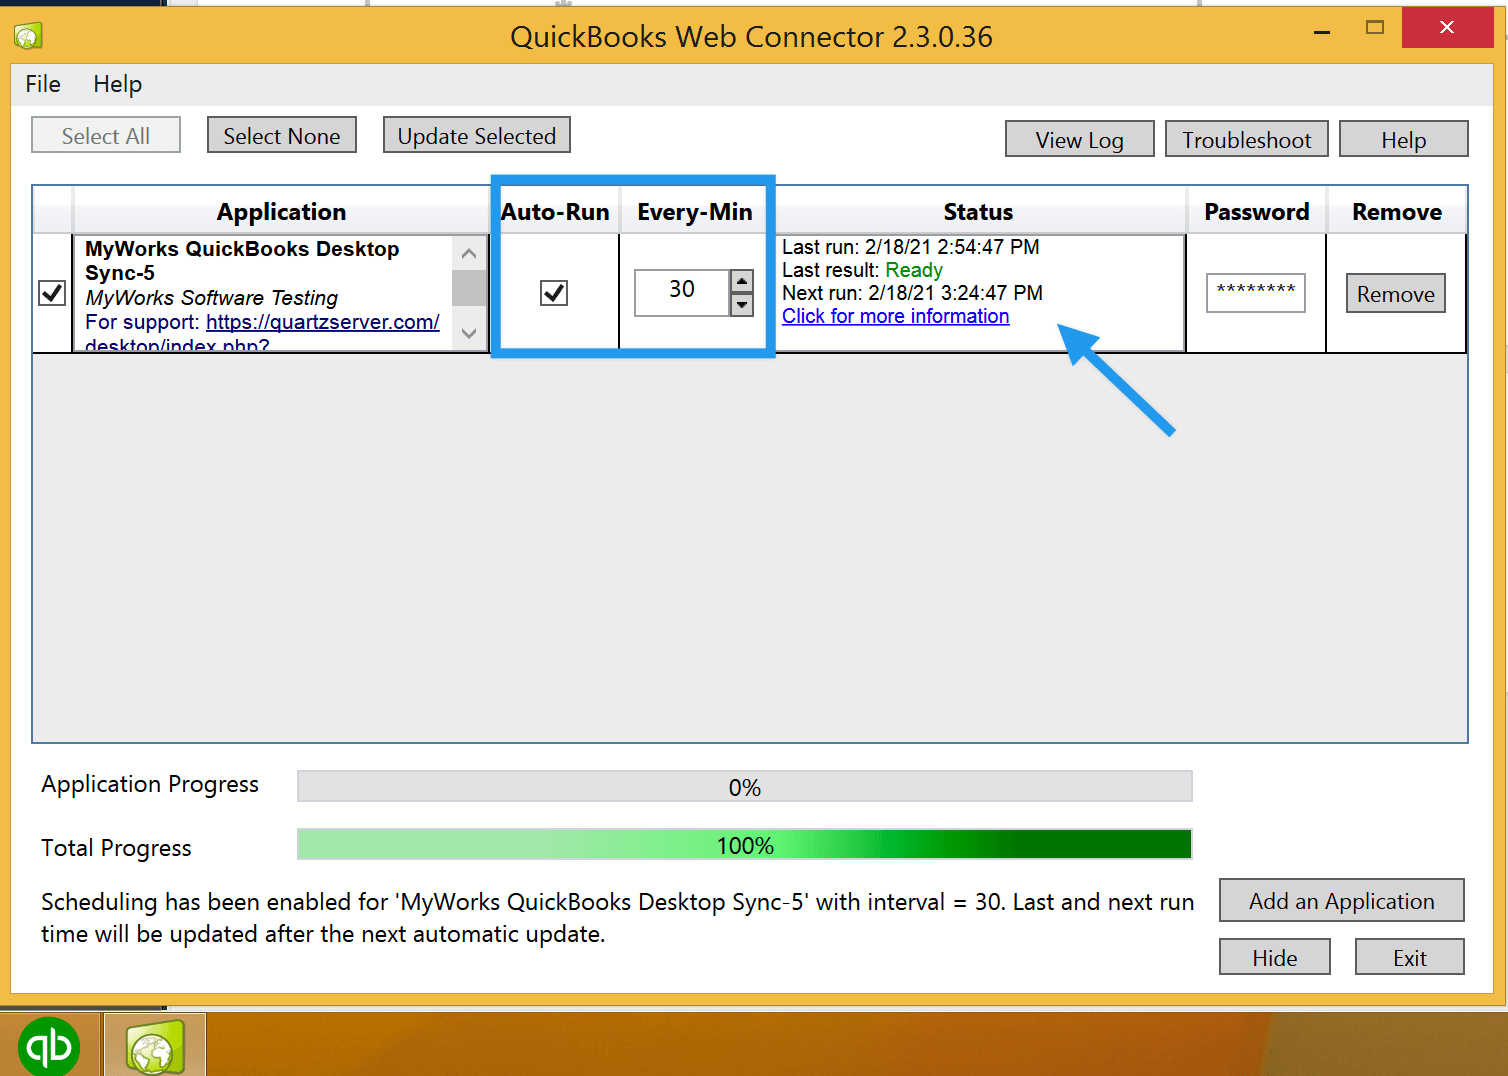
You may also configure the Web Connector's auto-run feature. This will let the web connector run every 15 (or more) minutes while the QB company file is open. After selecting the feature you will see the schedule on the bottom of the page.
Ongoing Use - Using Autorun vs. Manually Running
If you wish to have more control over when data is synced into QuickBooks through the Web Connector, you may leave the AutoRun box unchecked and simply click Update Selected whenever you wish to run a sync. Our plugin will simply build up activity in the plugin Queue since the last sync was performed - so it's perfectly fine to manually run the sync whenever you'd like.
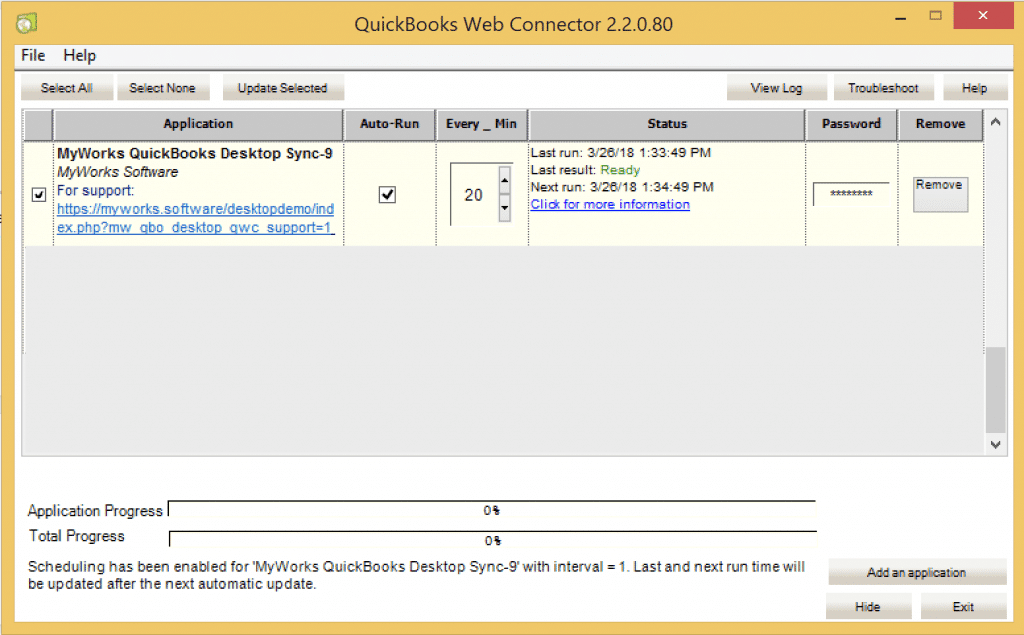
However, if you would like data to be synced more regularly or in near-realtime to QuickBooks, this is where the AutoRun feature comes in. To have the QuickBooks Web Connector automatically connect to our plugin and sync data to QuickBooks on a regular basis, check the AutoRun box, and set a value (in minutes) for how often you'd like the sync to run. Our recommended values are between 10 - 60. You can set it lower than 10 for closer to a real time sync, however this depends on the volume of data that would be queued in 10 minutes - you want to ensure the Web Connector finishes the sync before a new one starts.
Multiple Computers
Sometimes you may have multiple users (with their own computer) in your company who would like to use the web connector to sync data from your site with QuickBooks. You can read about best practices for this scenario here.