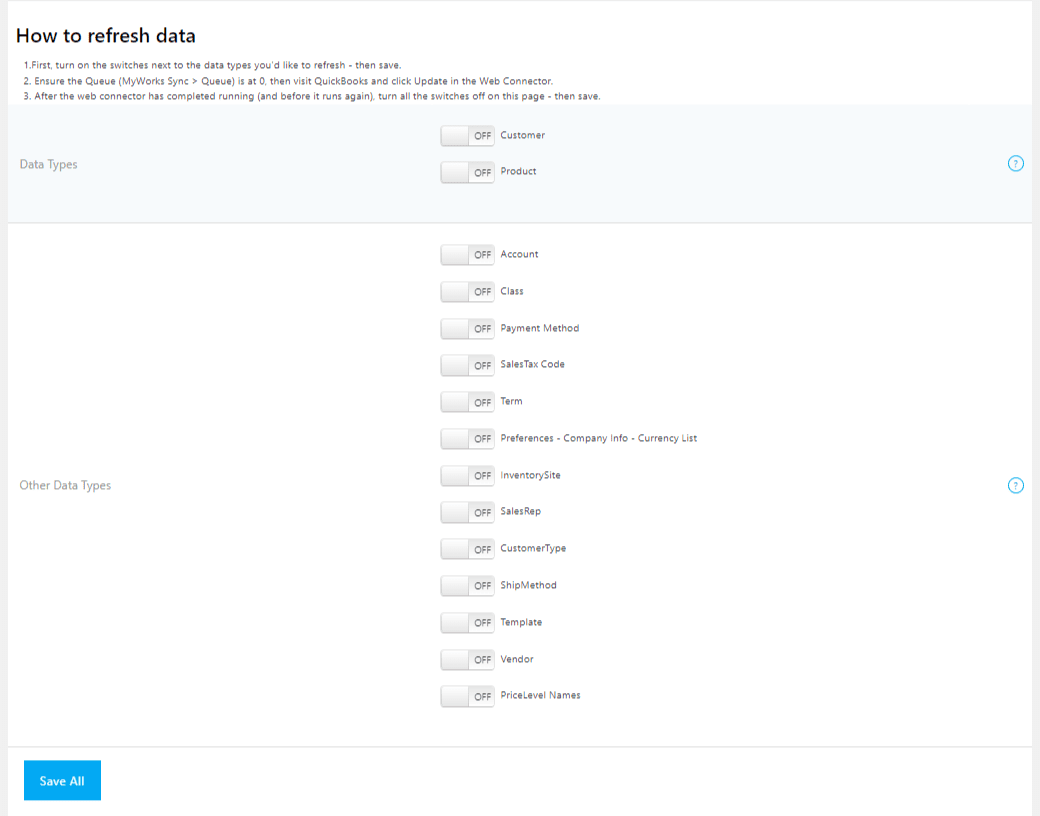
One of the first steps to take after connecting your WooCommerce store to QuickBooks in the MyWorks Sync Connection tab is to Refresh Data - to pull in your lists of customers, products, accounts, and more into our integrations settings. You'll use these lists to set default settings and map existing data to finish getting set up.
Since refreshing data lets MyWorks recognize or “rescan” your full list of QuickBooks customers, products, accounts, and more into MyWorks Sync, you'll only need to refresh data if you change or delete something in a list of data that you need to adjust in our sync for settings/mappings.
Note: MyWorks automatically recognizes new customers/products added in QuickBooks.

To refresh data, follow the below steps:
- Visit MyWorks Sync > Refresh Data in your WordPress admin.
- Enable the master switch and any switches for data you wish to refresh (ex. Customer, Product) - then save.
- Ensure the Queue in MyWorks Sync > Queue is empty - (0).
- Visit the Web Connector on your computer and click Update Selected.
- Once the progress bars are complete in the Web Connector, re-visit the Refresh Data page above, turn off all the switches, and save.
Notes:
- The Web Connector should not have the Auto-Run checkbox turned on while refreshing data. This is to ensure that the Refresh Data request finishes before being looped to start over again.
- While data is being refreshed, log entries will be created in MyWorks Sync > Log to record progress. You may visit this at any time to while the Refresh Data is running to view progress.
- The Web Connector app limits 100 items to each request, so our application breaks down the requests also into 100 items. So, for example, if there are 5000 products in your QuickBooks, the Web Connector app will go through 50 requests to pull them all into our plugin. You only have to hit Update Selected once.